Downloading multiple files concurrently is a necessary feature for a download manager app. Using UITableView is the best solution to manage multiple downloading tasks at the same time. In a table, we can maintain each separate downloading task in each table row. In this tutorial, I will use UITableView to manage all download threads. In each UITableView cells, I will put a progress bar inside to observe the downloading progress. To control the download task separately, I will also put a start button and pause button in each UITableView cell. Therefore, I will also show you how to custom UITableView cells in this tutorial.
This is the tutorial 3 of iOS download manager app tutorial. In this tutorial, I will give some example to show you how to download multiple files concurrently, and use UITableView to manage each downloading task separately. You can also access the whole tutorial series with following links:
Tutorial 1 of Download Manager App: Download File in Swift5 Start Pause and Resume
Tutorial 2 of Download Manager App: Save and Load Downloaded Data Locally in iOS by Swift5
Tutorial 3 of Download Manager App: Download Multiple Files Simultaneously in iOS
In previous tutorials, I complete the basic functions in my Download Manager iOS app. In version 2.0, it can download a file and save it in local iOS device. It also allows you to pause the download task and quit the app. You can continue the download once you come back. In this tutorial, I will complete another good feature. The final app will allow you to download multiple files simultaneously. You can see the download progress for each download task, and start or pause any download tasks you want.
Layout UITableView and UITableViewCell
Before I start to customize UITableView and its table cell, let’s talk about the default UITableView and UITableViewCell first. A table consists of several table cells. iOS provides UITableView as the container which wraps a set of UITableViewCell to make a table. The default UITableViewCell provides several basic functions for normal usage. If we just want to show text in table, we can simply use the default UITableViewCell. If we want to show some fancy content like images or graphics in the table cell, then we have to customize the table cell by creating a subclass which inherits from UITableViewCell. Now let’s start to create a simple table first.
This example will continue from last tutorials example. So I will remove all UI utilities from the DownloadViewController.xib. Don’t worry about it because I will later add them into the table cell.

After I remove all UI widget, I will drag a UITableView on the stage.

Let’s set the constrain of the table view so the table view will look nice in different screen size.

We can also set some attributes of the tables such as row height, header height, or footer height. But normally, we will overwrite these attributes in the code.
Now let’s move to the code and insert all logic to create a simple table. To show a table, we need to set two delegates of the UITableView:
- UITableViewDataSource: provides data shown in the table
- UITableViewDelegate: control the appearance of the table cell
So I will make DownloadViewController to implement these two delegates first. After changing, the class looks like:
class DownloadViewController: UIViewController, NSURLSessionDelegate, NSURLSessionDownloadDelegate, UITableViewDelegate, UITableViewDataSource{
@IBOutlet weak var downloadTaskTable: UITableView!
....
}
In the viewDidLoad function, I will set UITableView’s delegates as the class itself:
self.downloadTaskTable.dataSource = self;
self.downloadTaskTable.delegate = self;
Then I will implement several delegates functions to show the table. The first one will be tableview heightForRowAtIndexPath, this function will overwrite the height of each table cell:
func tableView(tableView: UITableView, heightForRowAtIndexPath indexPath: NSIndexPath) -> CGFloat {
return 88;
}
The second function will be tableview numberOfRowsInSection, this function will tell the table how many rows there are:
func tableView(tableView: UITableView, numberOfRowsInSection section: Int) -> Int {
return 15;
}
The third function will be very important, tableview cellForRowAtIndexPath, this function will return a table cell object which is shown in the table row. Let me use the default UITableViewCell first.
func tableView(tableView: UITableView, cellForRowAtIndexPath indexPath: NSIndexPath) -> UITableViewCell {
var cell = tableView.dequeueReusableCellWithIdentifier("DownloadTaskCell");
if(cell == nil) {
cell = UITableViewCell(style: UITableViewCellStyle.Default, reuseIdentifier: "DownloadTaskCell");
}

cell!.textLabel?.text = "Test the UITableViewCell \(indexPath.row + 1)";
return cell!;
}

With this code, I will create a table with 15 rows. Each row is 88 point height and each row will show a piece of text. Let’s run the code and check how the table looks like:
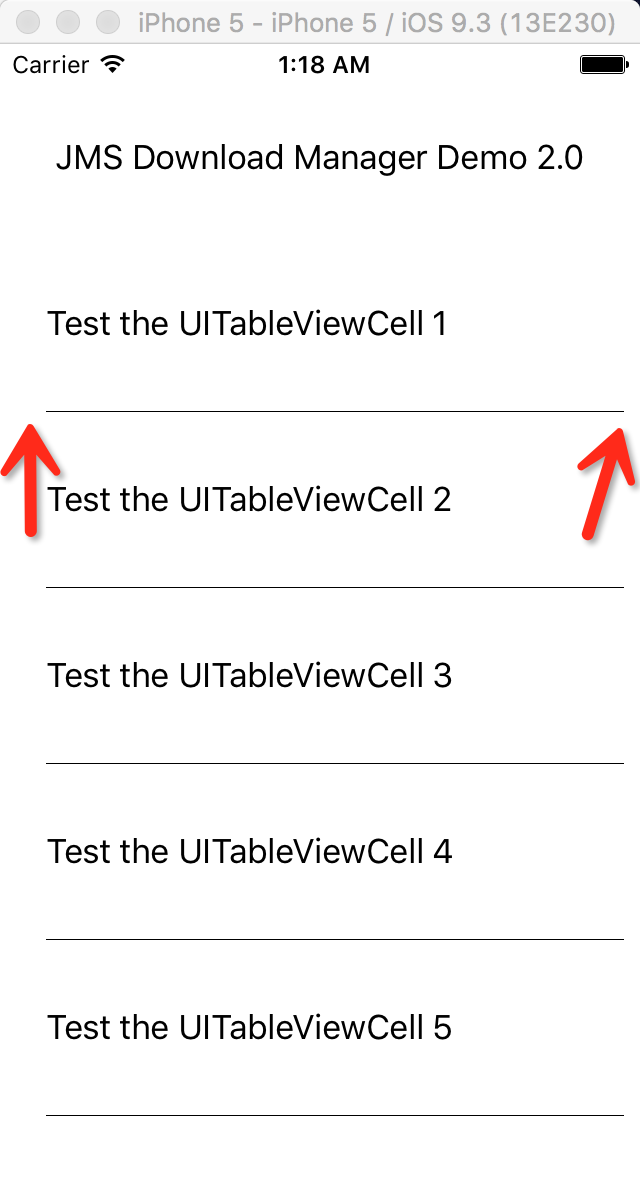
Do you notice that the table looks a little bit strange? The table has a big margin in the left.
Some people say we can just change position of the UITableView to hide this margin. Unlucky, it is not the right solution. Let’s look the UITableView and UITableViewCell more deeply. Let me implement another delegate method to set some background color on the table.
func tableView(tableView: UITableView, willDisplayCell cell: UITableViewCell, forRowAtIndexPath indexPath: NSIndexPath) {
cell.contentView.backgroundColor = UIColor.redColor();
cell.textLabel?.backgroundColor = UIColor.brownColor();
cell.textLabel?.textColor = UIColor.whiteColor();
}
As we can see, the table actually is centered in the stage. That’s why we should not to change the table position by setting its frame. And actually the problem is the separator line under each row having a left offset.

To remove the white space on the left, or move the separator to the left, we can call following function on UITableView to remove the separator inset.
self.downloadTaskTable.separatorInset = UIEdgeInsetsZero;
After that, we also have to change some attributes of UITableViewCell to set UITableViewCell’s margin to be 0.
cell!.layoutMargins = UIEdgeInsetsZero;
cell!.preservesSuperviewLayoutMargins = false;
Now, the white space before the separator is removed. There is still some space before the text though. It is because UITableViewCell set it’s label x position at 15 point.

At this moment, we successfully create a simple table by UITableView and UITableViewCell. However, it is not enough for our download manager app. I need a more complex table cell which can show download file name, download progress and download buttons. So in next section, I will show you how to implement all of these by customizing UITableViewCell.
Customize UITableView to Manager Multiple Download Task
To customize the table cell, we need to create another xib file to build the table cell UI. I am gonna create an empty UI interface, then drag a “Table View Cell” component inside. After that, I will also drag one label, one progress bar and two buttons in the table view cell. After I finish building the UI, I create a new “DownloadTaskCell.swift” file and bind it in “DownloadTaskCell.xib” custom class.


Now, we can start to use custom table cell in our table. At the beginning, I will define an array with several download urls. The table will show a download progress for each task. Now let’s see the code:
let urlList = [
["The Swift Programming Language Swift 2.2.epub", "https://swift.org/documentation/TheSwiftProgrammingLanguage(Swift2.2).epub"],
["Crossdomain.xml", "https://jmsliu.com/crossdomain.xml"]];
func tableView(tableView: UITableView, numberOfRowsInSection section: Int) -> Int {
return urlList.count;
}

func tableView(tableView: UITableView, heightForRowAtIndexPath indexPath: NSIndexPath) -> CGFloat {
return 88;
}

func tableView(tableView: UITableView, cellForRowAtIndexPath indexPath: NSIndexPath) -> UITableViewCell {
var cell:DownloadTaskCell? = tableView.dequeueReusableCellWithIdentifier("DownloadTaskCell") as? DownloadTaskCell;
if(cell == nil) {
cell = DownloadTaskCell(style: UITableViewCellStyle.Default, reuseIdentifier: "DownloadTaskCell");
}

cell!.layoutMargins = UIEdgeInsetsZero;
cell!.preservesSuperviewLayoutMargins = false;

cell!.name.text = urlList[indexPath.row][0];
cell!.progressLabel.text = "0%";
cell!.progressBar.progress = 0.0;

return cell!;
}

Let’s watch our new user interface.
That looks much great. At this moment, I feel the user interface is good enough to continue building main download manager logics. In next part, I will write more about how to manage several downloading tasks simultaneously.
Control Several Download Task Concurrently
In previous tutorials, I already show you how to download a single file in iOS, then save the downloaded data on local disk. Right now, I will improve the example to control multiple download tasks concurrently. In the new example, I will be able to start several download task at any time and echo the downloading progress of each downloading task. The app also has the ability to pause and resume each downloading task at any time. First of all, I will define a new class DownloadTaskInfo to store each download information. Here is the example source code of DownloadTaskInfo.swift:
import Foundation

class DownloadTaskInfo: NSObject {
var name:String?;
var url:String?;
var isDownload:Bool = false;
var progress:Float = 0.0;

var downloadTask:NSURLSessionDownloadTask?;
var downloadTaskId:Int?;
var downloadedData:NSData?;
}
Each downloading task will have one DownloadTaskInfo which stores the download information. All these information will be assigned when we create table cell for each downloading task.
Bind Click Event in Table Cell Programmatically
In each table cell, there is a “start” button and a “stop” button. When user clicks on these buttons, the corresponding downloading task will start or stop. We can add click event on these buttons when we create table row. Here I will give the example to show you how to add click event on button programmatically.
func tableView(tableView: UITableView, cellForRowAtIndexPath indexPath: NSIndexPath) -> UITableViewCell {
var cell:DownloadTaskCell? = tableView.dequeueReusableCellWithIdentifier("DownloadTaskCell") as? DownloadTaskCell;
if(cell == nil) {
cell = DownloadTaskCell(style: UITableViewCellStyle.Default, reuseIdentifier: "DownloadTaskCell");
}

cell!.layoutMargins = UIEdgeInsetsZero;
cell!.preservesSuperviewLayoutMargins = false;

let downloadTaskInfo = DownloadTaskInfo();
downloadTaskInfo.name = urlList[indexPath.row][0];
downloadTaskInfo.url = urlList[indexPath.row][1];
downloadTaskList.append(downloadTaskInfo);

cell!.name.text = downloadTaskInfo.name;
cell!.progressBar.progress = downloadTaskInfo.progress;
cell!.progressLabel.text = String(Int(downloadTaskInfo.progress)) + "%";

cell!.startBtn.addTarget(self, action: #selector(DownloadViewController.startDownloadSingleFile(_:)), forControlEvents: .TouchUpInside);

return cell!;
}
Above source code show how to customize the cell for each download task. In each cell, there is two labels, one progress bar, two buttons. addTarget will bind action startDownloadSingleFile to the startBtn for control event TouchUpInside. When users click on startBtn, the function startDownloadSingleFile is called. Here is the example source code:
func startDownloadSingleFile(sender: AnyObject) {
print(sender.superview!!.superview);
if(sender.superview!!.superview!.isKindOfClass(DownloadTaskCell)) {
let taskCell = sender.superview!!.superview! as! DownloadTaskCell;
let cellIndexPath = self.downloadTaskTable.indexPathForCell(taskCell);
let downloadInfo = downloadTaskList[(cellIndexPath!.row)];

if(downloadInfo.isDownload) {
//pause it
downloadInfo.downloadTask!.cancelByProducingResumeData({ (resumeData) -> Void in
downloadInfo.downloadedData = NSData.init(data: resumeData!);
self.writeCacheFile(downloadInfo.downloadedData, fileName: String(downloadInfo.url!.hash));
})

downloadInfo.isDownload = false;
(sender as! UIButton).setTitle("Resume", forState: UIControlState.Normal);
} else {
//start it or resume it
downloadInfo.downloadedData = self.readCacheFile(String(downloadInfo.url!.hash));
if(downloadInfo.downloadedData != nil) {
downloadInfo.downloadTask = urlSession?.downloadTaskWithResumeData(downloadInfo.downloadedData!);
} else {
let url:NSURL = NSURL.init(string: downloadInfo.url!)!;
downloadInfo.downloadTask = self.urlSession!.downloadTaskWithURL(url);
}

downloadInfo.downloadTaskId = downloadInfo.downloadTask?.taskIdentifier;
downloadInfo.downloadTask!.resume();
(sender as! UIButton).setTitle("Pause", forState: UIControlState.Normal);
downloadInfo.isDownload = true;
downloadInfo.downloadedData = nil;
}
}
}
The above function will do following things:
- 1. Find the download task basing on in which cell the start button is clicked.
- 2. It will check if current download task is downloading.
- 3. If the download task is downloading, cancelByProducingResumeData will be called to pause the download task.
- 4. If the download task is not running, it will check if the download task is paused or the download task is never started.
- 5. If we can find resume data of this download task, we will resume the task by calling downloadTaskWithResumeData. Otherwise, we will start the download task by calling downloadTaskWithURL.
In this example app, I predefined 4 download link. After I run the app, there are 4 download task in the table. We can download all of them concurrently.
Download Source Code at $9.99
Now you can get the full source code under $9.99 with all copyright. The payment is handling by PayPal. After you complete the purchase, you will get the download link of the source code immediately.
What happens if you start a download then go to a different screen and come back. Will it still remember the cell it was on and the progress it was at?
In my demo, I don’t implement this user case. But if you save all information globally, it will remember the progress.
It doesn’t remember or rather messes up the progress if you go to a new screen. Does anyone have any working example? i tried saving the instances in a singleton, and it still didn’t work
In my example, it only has one screen. I am not sure how your problem is caused. I think it is necessary for me to make the example a little bit complicated later.
how can we make the app download files when in the background? can you write code for that also? thanks in advance
You have to enable the app ‘background mode’ first.
where does this come from downloadTaskList.append(downloadTaskInfo);
can u explain pls?
Array of DownloadTaskInfo
where is the source code ?
You can check this post: http://jmsliu.com/3534/download-file-in-ios-start-pause-and-resume.html
Hello, could you provide the Xcode project which has been used in this example? Thank you.
You can also check this post: http://jmsliu.com/3534/download-file-in-ios-start-pause-and-resume.html
Hello, Can you provide code to apply progress bar in tableview cells to show audio playback process.
I need the same function which you have implemented, I want simultaneous download, if the user move to next screen it should remember the which cell and should be downloading the content. And also background download. Please reply me quickly I need help badly, send me some reference with same functionality.
You can use my source code in your project for free.
how to show download Process into tableView cells Please tell me
Please see the tutorial 1. It shows you how to show download progress.
how to define
self.writeCacheFile(downloadInfo!.downloadedData, fileName: String(downloadInfo!.url!.hash))
and
self.readCacheFile(String(downloadInfo?.url!.hash))
Hi, please check the Tutorial 2:https://jmsliu.com/3566/save-and-load-downloaded-file-locally.html
What if we did not enable background mode then what happens?
Current simultaneous download will work in foreground or will stop all?
Hello, if the background mode is diabled, it won’t download anything once you put the app in backend. If my explain is not clear, you can simply disable it and have a try. It will be easy to understand.